Sunday, January 12, 2014

// // Leave a Comment

Top 5 High Paying Alternatives To BuySellAds

BuySellAds is a direct banner advertising company where you can submit your blog for approval and once its approved you can add their empty banners to your blog/website. So, the advertisers will buy those empty spaces on your website and put their ads for 30 days for which you will get paid. But getting successfully approved from BSA is not a game of kids, their rules and regulations are very much strict even stricter than Google Adsense. But its paying are also more than Google Adsense.

So, today we are going to reveal the best and top 5 alternatives to BuySellAds. If you have submitted your blog to BSA and you are not approved, don't worry there are many good alternatives to BSA by which you can monetize your blog for earning huge bucks. So, before wasting more of time we will move ahead straight towards those alternatives.

Previous Artilces:

Read This: Top 10 Tips For Increasing Blog Traffic

Read This: Add Google+ RSS Feed Widget For Blogger

Read This: Adding A Contact Us Form In Blog Embed code

1. Google Adsense

If you failed in getting approval for BSA, than Google Adsense is our first and foremost recommendation to you because BSA has many strict policies as we discussed earlier. So, just go for Adsense. Minimum criteria for Google Adsense are mentioned below :
Minimum Criteria :

  • Your site must receive 200-300 visitors daily.
  • The domain should be at least 6 months old.
  • Your site must contain unique and quality content.

2. Publicity Clerks


No doubt ! this is the second best alternative to BuySellAds. Its also same like BSA, where you have to create an account and than submit your site for approval. Within a week you will get notification for your site's approval or disapproval. Its a completely new emerging network that is considered to be the best competitor of BSA Yet. 
Minimum Criteria :

  • Your site must be finished and not under construction.
  • Your site must have a unique domain (Not as .blogspot or .wordpress etc)
  • Your site must receive at least 600 impressions daily.
  • Your site must be in English.

3. Project Wonderful


Yes! our third recommendation to you is Project Wonderful. This banner advertising network is considered most beneficial as it provides you with several options and its minimum approval criteria is also pretty low. You can get easily approved for it. The rest, they take 25% as a commission like BSA. So, you must not forget it.

4. Infolinks


Infolinks is also emerging as a good competitor to BSA and seveal other networks. It provides you link ads between the text of your content in addition with popup ads and link units. Its paying are good and its minimum criteria is also pretty low. If you have a blog/website which contains text than you can have a good chance of approval.
Minimum Criteria : 

  • Your site must contain text content.
  • Your site must have original content.

5. Chitika Ads


The final recommendation to you as an alternative of BuySellAds is Chitika Advertising network. Its also an excellent ads network from which you can earn pretty good money online. Its minimum criteria is also low and you don't need any professional and unique domain like .com or .net etc. So, if any of the above doesn't work for your, just don't forget to try this one and we are pretty sure you will succeed in this ;).

Final Words 

If you enjoy this article please share this with your friends and stay tuned more interesting articles ae waiting for you if you need any help please feel free to contact us or leave a comment below will reply will be highly appreciate thanks.
Read More
// // Leave a Comment

Make a jump break jump to where you want to

Jump breaks are great, but the jump target is not always what you want: exactly at the place where <!--more--> was. Maybe you'd like to show the whole post instead. Here is a simple tip to alter the target position. You have to use the html editing mode for these hacks to work.

Somewhere in post before the <!--more-->

Just put <a name="more"></a> where you want the jump target (before <!--more-->). It can be at the start of the post text, for example.

Start of post including title

Maybe you want to go higher than start of the post text. Put this at the start of the post, this one includes post title, too (and this post is a demonstration of this variation):

<a style="position:absolute;top:-4em;" name="more"></a>

Start of page

<a style="position:absolute;top:-99em;" name="more"></a>

Just play around with these a while, and I think you'll get the drift.

Strictly speaking, adding another #more target to the page produces invalid html: there's duplicate anchor name in page and html validators will complain about that. But it works: browsers just use the first anchor they find, no complaints. :) 
Read More

Saturday, January 11, 2014

// // 5 comments

Customize Label Widget In Blogger With Beautiful Style CSS3

Today i am going to share how to customize label widget in blogger with beautiful style.

You may also read my previous articles to make your blogger stylify.

Read This: Multi colored random posts Widget for Blogger

Read This: Add Multipul Related Post Widget & LinkWithin For Blogger

Customize Label Widget In Blogger With Beautiful Style CSS3

Just follow These Steps:

  • Go To Blogger >> Layout >> Add a Gadget
  • Choose "Labels" Widget.
  • Make Settings Like The Below Image & "Save" It.

Customize Label Widget In Blogger With Beautiful Style CSS3

Now the widget has been added into the blog and let's customize the label cloud widget.

Step 2. Customizing Labels Cloud Widget

  • Go To Blogger >> Template >> Backup Your Template
  • Click Edit HTMl and Find For ]]></b:skin>
  • Copy and Paste The Following Code Above ]]></b:skin>

/* Flat UI Labels Cloud By Www.Tonyisright.blogspot.Com ---------------- */
.sidebar .label-size {
  position:relative;
  text-transform: uppercase;
  text-decoration:none;
  font-size:13px;
  font-family:Open Sans;
  color:#fff!important;
  }
.sidebar .label-size a {
  color:#fff!important;
  font-weight:bold;
  padding:8px 10px;
  margin:0 6px 6px 0;
  float:left;
  display:block;
  -moz-transition: all 0.4s ;
  -o-transition: all 0.4s;
  -webkit-transition: all 0.4s ;
  -ms-transition: all 0.4s ;
  transition: all 0.4s ;
}
.sidebar .label-size-1 a {background:#1abc9c;border-bottom:3px solid #127F69;}
.sidebar .label-size-1 a:hover {background:#16a085;}
.sidebar .label-size-2 a {background:#3498db;border-bottom:3px solid #226693;}
.sidebar .label-size-2 a:hover {background:#2980b9;}
.sidebar .label-size-3 a {background:#2ecc71;border-bottom:3px solid #1F8C4C;}
.sidebar .label-size-3 a:hover {background:#27ae60}
.sidebar .label-size-4 a {background:#9b59b6;border-bottom:3px solid #74398E;}
.sidebar .label-size-4 a:hover {background:#8e44ad}
.sidebar .label-size-5 a {background:#e74c3c;border-bottom:3px solid #922C20;}
.sidebar .label-size-5 a:hover {background:#c0392b}

You have done.

Final Words

Now you have done i you enjoy this article please share this with your friends and stay tuned more interesting articles ae waiting for you if you need any help please feel free to contact us or leave a comment below will reply will be highly appreciate thanks.
Read More

Monday, January 6, 2014

// // Leave a Comment

How To Create A Blog Post In Microsoft Word

Hi friends after i long time research today i am sharing how to create blogger blog post easily with Microsoft word just follow the steps below.

How To Create Blog Post In MS Office Word:


  • Goto your windows star menu
  • click on MS Office Word


  • create a new document
  • click on new blog post as see in image 


  • Provide your blogger blog Account
  • and click next


  • Enter post title and post body
  • click on publish button


Last Words:

Now you have done i you enjoy this article please share this with your friends and stay tuned more interesting articles ae waiting for you if you need any help please feel free to contact us or leave a comment below will reply will be highly appreciate thanks.

Read More

Friday, January 3, 2014

// // 3 comments

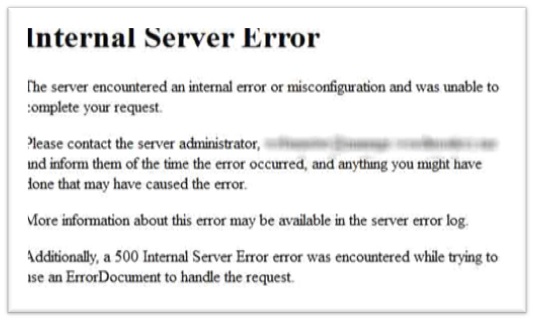
How to Resolve the Internet Server Error in WordPress

Internet Server Error is one of the most common WordPress errors which have made the WordPress beginners lose their nerves. The HTTP 500 Internal Server error is a very general HTTP Status Code, which means something has gone wrong on the website’s server, but the server could not specify what the exact problem is.


Reasons for Getting Internal Server Error in WordPress:

Internal server error is not just specific to WordPress, but is generic in nature. It can happen with anything else running on your server. Therefore, before finding solutions to this error it is important to identify the location of the problem. Internet Server Error in WordPress is possible for many reasons like plugins, theme functions, corrupted .htaccess files, and PHP memory limit.

However, the server error in WordPress can be fixed with a little bit of patience. Here is a list of all possible solutions to resolve the internet server error in wordpress.

Checking for Corrupt .htaccess File
 First thing you need to do while trouble shooting the server error is to check for the corrupt .htaccess file. You can do this by renaming your main .htaccess file for which you will have to log in to your site using the FTP. Once you have renamed, try loading your site to check if the problem has been solved. If this solution does not work then you can try the methods listed below.

Increasing the PHP Memory Limit
Exhausting your PHP memory limit can cause the server error in WordPress. Many WordPress development company faces problems due to this error. So, to increase the memory limit, you can follow these steps:

 Create a blank text file called php.ini
Paste this code in their: memory=64MB
Save the file
Upload it into your /wp-admin/folder using FTP
Deactivate all Plugins
If the above solutions are not working for you then it means that the error is caused by a specific plugin which is not easy to find out. Therefore, it is required to deactivate all the WordPress plugins at once. If disabling all plugins fix the error, then clearly it is one of the plugins that was causing the error. So, you can now go through and reactivate one plugin at a time until you find the one causing the issue. Once you find it out, you can get rid of it and report the error to the plugin authority.

Ask Your Hosting Provider
If none of the above solutions work, then you need to contact your hosting provider who can look after the server logs to get to the bottom of the issue.

These possible solutions may help a web development company providing WordPress development services to deal with the Internal Server Error in WordPress.

Soucre of info  techntechie.com
Read More
// // Leave a Comment

Facebook status updates, wall posting and payments was Down (Update : The problem resolved )..


Many of the User's was having Trouble on Facebook Updating their status , wall posting and much more.. Some users received errors Monday morning whenever they try to share a status update or send messages to friends. When attempting to post an update, users may see a message like "there was an error updating your status."

In a statement issued Monday, Facebook says the errors have been fixed. "Earlier today morning, while performing some network maintenance, we experienced an issue that prevented some users from posting to Facebook for a brief period of time," reads the statement. "We resolved the issue quickly, and we are now back to 100%."

News of Facebook issues first surfaced through a series of posts on Twitter from users complaining of issues with posting status updates or even liking content from friends.

Facebook's developer page confirms the latter, noting that it's been offline since at least 4:46AM PDT And Now its all Resolved... 
Read More
// // Leave a Comment

Official Facebook App for Windows 8 is now available

Good News for Windows 8 users.. A few days back Microsoft's Latest operating system Windows 8.1 Update was available for all windows users.. The Good News is that One of the Most Popular social networking site " Facebook " has released their Facebook App for Windows 8 Users..


Yes, Official Facebook App for Windows 8 users is now available on Windows store for download also it's for free !! Just go to Windows store by using your store app on windows 8 or you can get there directly from the given link below..

Screenshots of

News Feed 


Timeline


Download

You can download it from Microsoft's Official Website : Download Facebook App for Windows
Read More