Adding share button on your blog post will increase page views and readership. There are several style of placement you can use. My favorite is adding them under blog post. Those colorful button are fast and easy to search. For this gadget, I usually use Share This service. You don't have to add all of them. Just pick social media that you use the most or focus on.
If you like the social media button that I added under every blog post, I'll give you the code, just follow this easy blogspot tutorial for beginner:
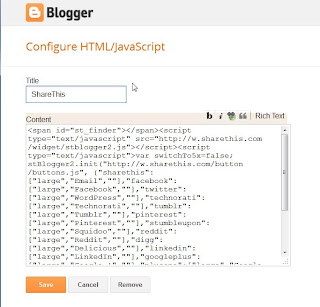
1. Go to your blogger/blogspot LayOut, and click on Add Gadget.
2. Choose HTML/JavaScript gadget. Copy - paste code below on the gadget box:

3. Now place the gadget wherever you want. The gadget always appear on the bottom of blog post, doesn't matter where you place them. But, don't place them between gadgets on sidebar, cos when people visit your page, there will be blank space. I usually adding them below blog post gadget or on the bottom of sidebar gadgets.
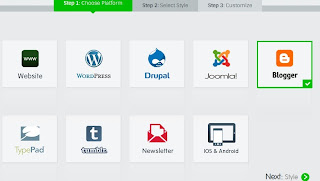
Now, just in case you don't like my social media selection, and want to add them yourselves, follow the steps below:
Blogspot Tutorial: Adding Share This Social Button:


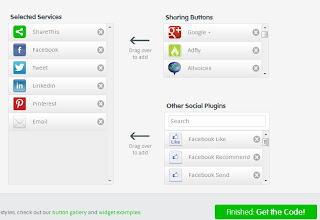
Every time you pick your button on right sidebar, it will added automatically on left bar. When you finish, click Get the Code button. The register box will show up, just click x (no thanks, just give me a code) on the right bottom. Copy-paste the code to HTML/Javascript gadget box.
If You Like My Post Please Share This
If you like the social media button that I added under every blog post, I'll give you the code, just follow this easy blogspot tutorial for beginner:
1. Go to your blogger/blogspot LayOut, and click on Add Gadget.
2. Choose HTML/JavaScript gadget. Copy - paste code below on the gadget box:
<span id="st_finder"></span><script type="text/javascript" src="http://w.sharethis.com/widget/stblogger2.js"></script><script type="text/javascript">var switchTo5x=false;stBlogger2.init("http://w.sharethis.com/button/buttons.js", {"sharethis":["large","Email",""],"facebook":["large","Facebook",""],"twitter":["large","WordPress",""],"technorati":["large","Technorati",""],"tumblr":["large","Tumblr",""],"pinterest":["large","Pinterest",""],"stumbleupon":["large","Squidoo",""],"reddit":["large","Reddit",""],"digg":["large","Delicious",""],"linkedin":["large","LinkedIn",""],"googleplus":["large","Google +",""],"plusone":["large","Google +1",""],"fblike":["large","Facebook Like",""]} , "bl-6f6f3ce4-f6b6-7692-9d8d-55623b908a29");var f =document.getElementById("st_finder");var c = f.parentNode.parentNode.childNodes;for (i=0;i<c.length;i++) {try { c[i].style.display = "none"; } catch (err) {}}</script>

3. Now place the gadget wherever you want. The gadget always appear on the bottom of blog post, doesn't matter where you place them. But, don't place them between gadgets on sidebar, cos when people visit your page, there will be blank space. I usually adding them below blog post gadget or on the bottom of sidebar gadgets.
4. View Blog. Now you have it.
Now, just in case you don't like my social media selection, and want to add them yourselves, follow the steps below:
Blogspot Tutorial: Adding Share This Social Button:
1. Go To Share This Platform

2. Click Next to Select Style.

3. Click Next to Customize.

Every time you pick your button on right sidebar, it will added automatically on left bar. When you finish, click Get the Code button. The register box will show up, just click x (no thanks, just give me a code) on the right bottom. Copy-paste the code to HTML/Javascript gadget box.
4. View Blog.
If You Like My Post Please Share This


